After a bit of discussion earlier today on Twitter with photographer, author and all around nice guy John Urbancik, I decided to write a quick blog on how I would approach a problem in Photoshop. In this case, scratches.
Now, there are untold types of scratches, so I won’t go into too far really. In this case, I’m showing a couple of methods of “scratching” someone’s skin. In this case… ahem… mine.
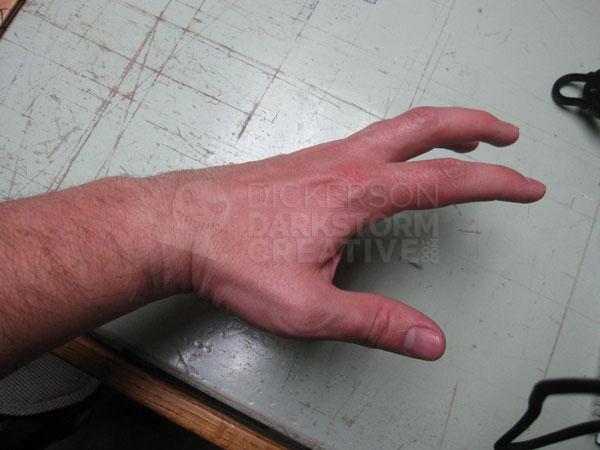
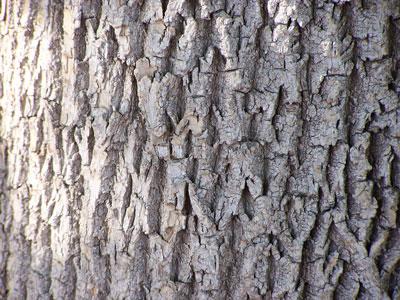
I took a photo of my hand (to which my little girl without missing a beat, says, “why are you doing that? Can I do that too? What about a leg?”, and so on. Here’s the unadulterated pic of that, and, for this demonstration, a texture image of a tree.
Now, before I get too far ahead of myself, there are billions (and billions and buuulllions) of ways to do this very same thing, this is just one way. As my friend says, your mileage may vary.
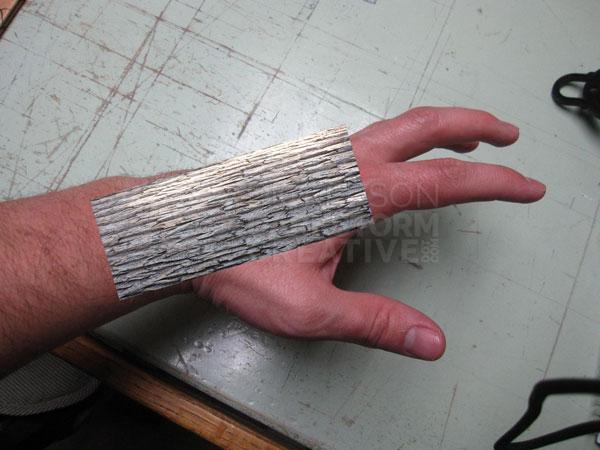
In Photoshop, I take the tree bark photo and drag it into the hand photo. It doesn’t have to be tree bark, really any texture that has or can be made to be narrow and thin will work. Grass, tree bark, house siding, celery, whatever texture you want your scratches to have. In this case, the bark is too “fat”, too wide to convincingly be made to look like scratches. So we squish it a bit, and then rotate it to match the angle of the hand.
You have to think of this as a story almost. You can’t just throw any texture at it, it will be obvious to everyone that it’s manipulated. You have to toy with the angle a bit to match your object, in this case I’ve turned the texture a bit to match. You may also need to go further, such as skewing it, or distorting one corner, or even using Photoshop’s Liquify filter to help it match some.
You don’t need to spend hours getting that angle perfect, you’ll probably end up needing to tweak it a bit later on anyway. As long as it’s pretty close, you’re fine. To help the texture work with the tones, shadows and texture of the hand, you can manipulate Photoshop’s Layer Blending Modes to get what you want. Now, each blending mode has a specific effect, but to be honest I tend to just cycle through them until I see what I like. In this case, I’m leaving it (for now) on “Vivid Light”.
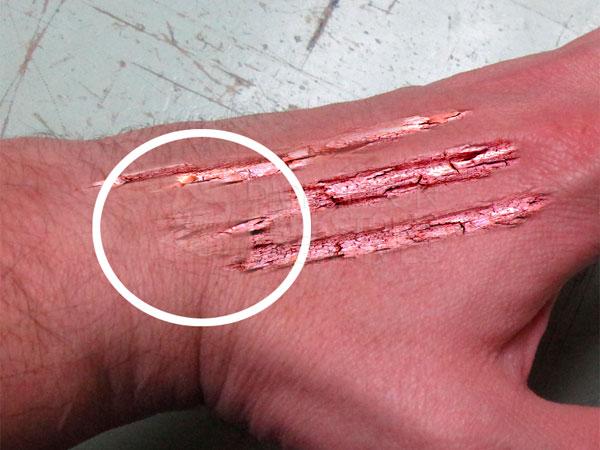
At that point, add a layer mask to the tree bark layer and start working out how your scratches are going to work. You can erase it instead, but then if you want to edit the effect, or expand on it, it’s much harder to pull off. Using a layer mask, you can work over the bark until it matches your idea of scratches. Just make sure you don’t leave any hard edges. This is an organic item, so a flat edge in it is a dead giveaway.
It’s quite a bit different now, and far more striking. It’s also wrong. As you can see, the location and the angle are wrong, but again, that’s why you don’t spend all that time above. Just fix it up a bit, not only making sure that the angle is right, but that the texture isn’t awkwardly crossing a fold or other skin anomaly.
Scratches can of course cross a fold in real life, but they wouldn’t be constant through the gap. There would be a section of skin missed, so you either account for that in the image or you move the scratch so it doesn’t interfere.
The other thing to watch out for is obvious digital editing. Whenever you edit a texture or layer, there’s a chance you’ll leave part of it behind (like a ghost). Even if those ghosts are really tiny in the picture, the human eye will notice something is wrong. The best way to get rid of those while you are freehand painting the mask is to just make your brush size smaller and smaller. Not too small though, or you’ll get an obvious hard edge.
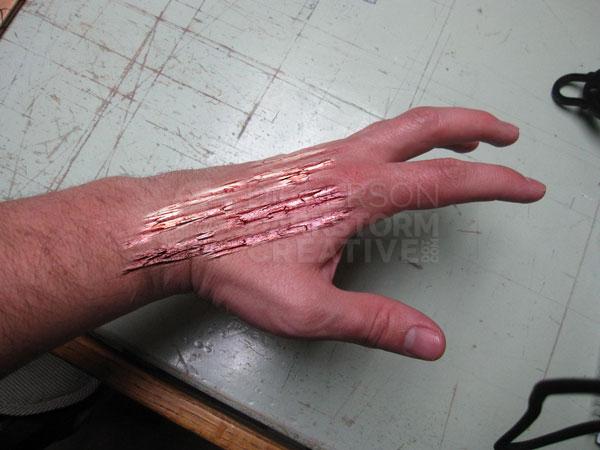
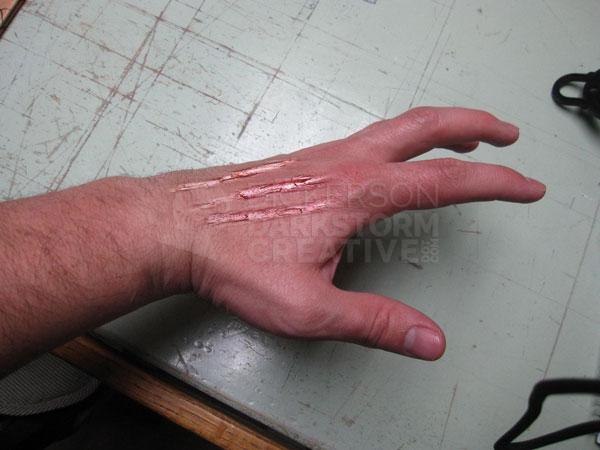
After you work with it a little more, you can come out with a nice set of scratches:
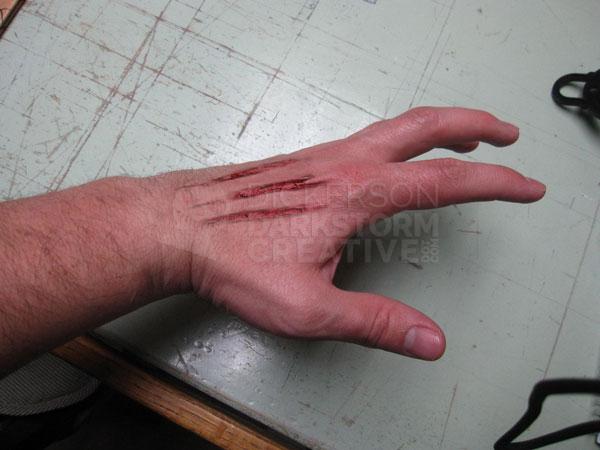
Now, I don’t mind that color, but I’m thinking something a little more interesting, possibly even more subtle, would be nice. After a little more mask manipulation, a change to the “Color Burn” Layer Blending Mode, and a slight blur on the bark’s mask, I have this:
Which to me looks much more painful, and in fact I keep looking at my hand to see if it’s still ok. It is the witching season after all, and maybe I cursed myself. I’ll be back in a minute, I’m going to go look for some peroxide.
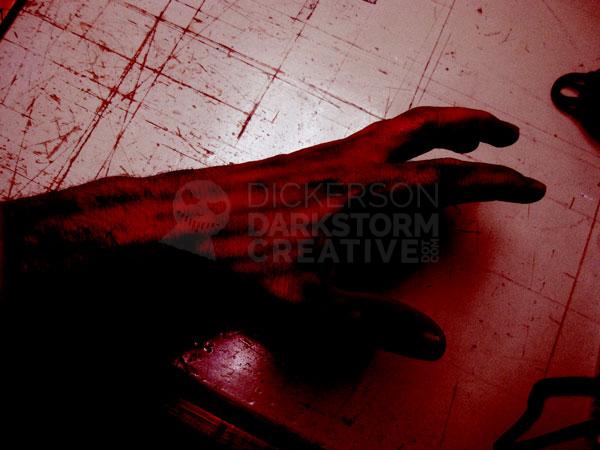
Oops.. too late.
One quick note: you can easily have the scratches be brush strokes on their own layer. Depending on the texture you’re going for (skin, wood, metal, etc.) you can paint it and then mess with the blending modes.
One other quick note: another way is to use a harder edged brush on a new layer, and set the layer style to “bevel and emboss”. Then you can literally paint on a 3D-ish scratch around the edge of something. Especially for metal or wood, or something with “rough parts” coming off of the scratch, that would work well.
